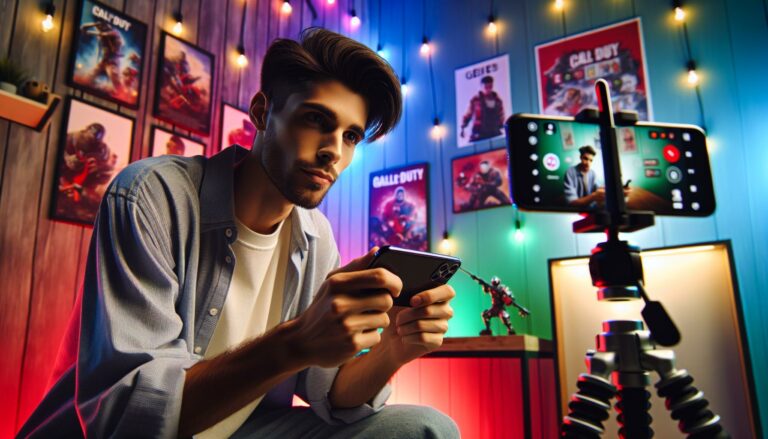
Touch controls have come a long way, but if you’ve ever fumbled a clutch moment in Call of Duty Mobile because your thumb slipped, you already know they have limits. Mobile gaming controllers bridge the gap between casual convenience and competitive precision, turning your smartphone into a handheld console that fits in your pocket.
The mobile gaming controller market has exploded in 2026, with options ranging from $30 clip-ons to $150 premium solutions that rival console-grade gear. Whether you’re grinding ranked matches in PUBG Mobile, speed-running Dead Cells, or diving into Apple’s AAA ports, the right controller can cut input lag, improve accuracy, and make long sessions way more comfortable.
This guide breaks down everything you need to know: controller types, must-have features, compatibility gotchas, and real-world recommendations for every budget. Let’s get into it.
Key Takeaways
- Mobile gaming controllers eliminate touch control friction by offering analog sticks, physical triggers, and tactile buttons that improve accuracy and competitive performance in ranked games.
- Telescopic controllers like the Razer Kishi V2 and GameSir X2 Pro deliver the best portability-to-performance ratio with direct USB-C connections and zero latency, while Backbone-style controllers add premium features like pass-through charging and app integration.
- A mobile gaming controller should prioritize responsive buttons with clear actuation points, ergonomic weight distribution (200-300g), and compatibility verification—checking your phone size, case thickness, and specific game support before purchasing.
- Controllers unlock full potential in action games, shooters, platformers, and AAA ports where analog precision outmatches touch controls, while competitive ranked modes separate controller and touch input players for fairness.
- Budget-friendly controllers like the GameSir X2 Pro ($50-60) offer solid performance for casual play, whereas premium options ($110-150) justify costs through Hall Effect sticks, programmable buttons, and superior build quality for daily gamers.
What Is a Mobile Gaming Controller and Why You Need One
A mobile gaming controller is a physical input device that connects to your smartphone or tablet, replacing touch controls with tactile buttons, analog sticks, and triggers. Most use Bluetooth or direct USB-C/Lightning connections, offering console-like precision for games that support gamepad input.
The case for controllers boils down to three things: accuracy, ergonomics, and competitive edge. Touch controls rely on virtual overlays that eat up screen real estate and offer zero tactile feedback. Try pulling off a 180-degree flick shot in a shooter or executing frame-perfect inputs in a platformer with thumbs alone, it’s doable, but you’re fighting the interface.
Controllers eliminate that friction. Analog sticks provide finer movement control than dragging your thumb across glass. Physical triggers give consistent travel distance for shooting and accelerating. And buttons? They register every press without your fingers blocking critical HUD elements.
Beyond performance, ergonomics matter for anyone playing longer than 20 minutes. Holding a flat phone gets uncomfortable fast. Controllers add grips, contoured handles, and weight distribution that reduce hand fatigue during marathon sessions. If you’re serious about mobile gaming, whether that’s climbing ranked ladders or clearing roguelike runs, a controller is the single best upgrade you can make.
Types of Mobile Gaming Controllers
Mobile controllers come in four main form factors, each with trade-offs between portability, comfort, and compatibility. Here’s what you need to know about each style.
Clip-On Controllers
Clip-on controllers mount your phone above a traditional gamepad, securing it with an adjustable clamp. They work with most standard Bluetooth controllers like the Xbox Core or DualSense, though dedicated clip attachments (sold separately) are required.
The upside? If you already own a console controller, you’re halfway there. Just grab a phone clip for $15-25 and you’re set. The downside is portability, these setups are bulky and awkward to pocket. Weight balance can also be an issue: top-heavy mounting puts strain on the controller’s clamp over time.
Clip-ons shine for home use or travel where you’ve got bag space. They’re less practical for commuting or quick sessions on the go.
Telescopic Controllers
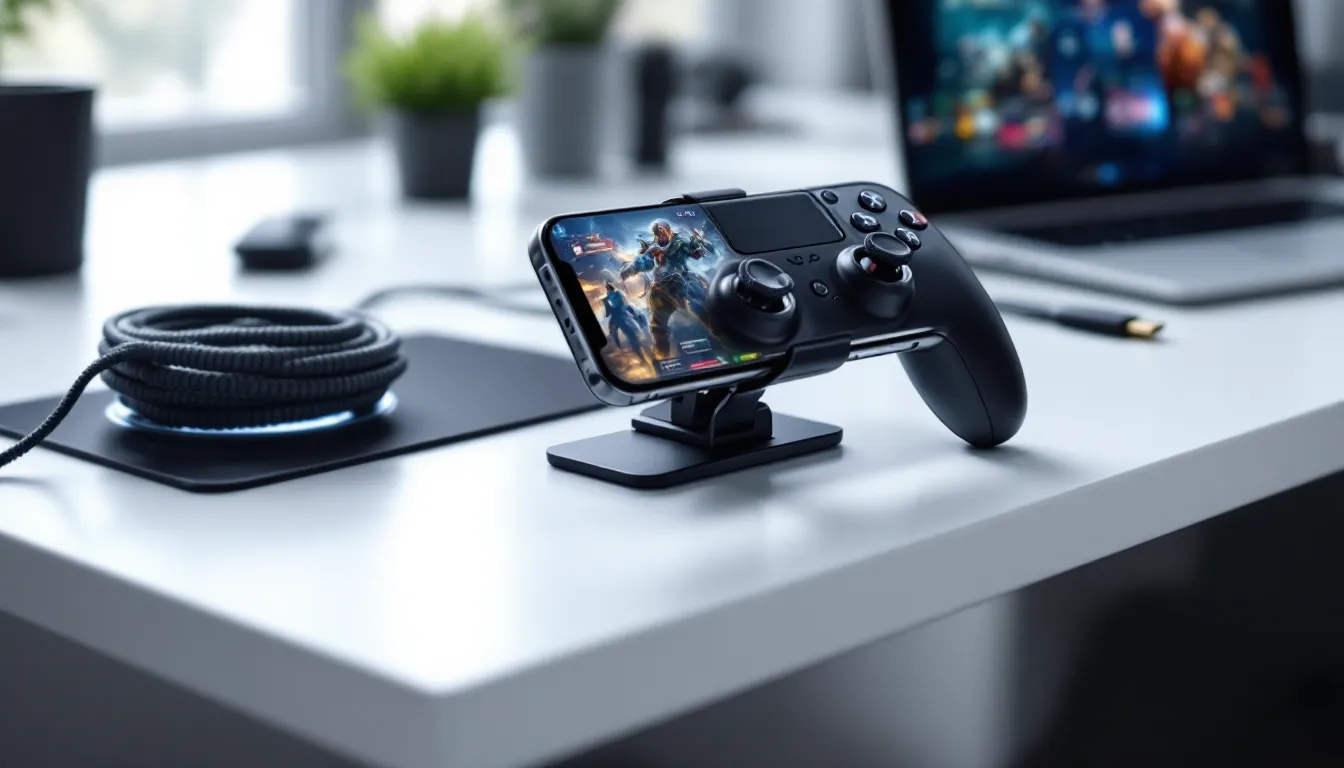
Telescopic controllers extend horizontally, clamping your phone between two grips that house all the buttons and sticks. Think Nintendo Switch Joy-Cons, but for your phone. Popular models include the Razer Kishi V2 and GameSir X2 Pro.
These offer the best portability-to-performance ratio. They collapse for easy storage, connect via USB-C or Lightning (meaning zero latency), and maintain a balanced weight distribution that feels natural in your hands. The direct connection also bypasses Bluetooth lag entirely, crucial for competitive play.
The catch? Device compatibility can be fickier. Thicker phone cases often don’t fit, and some models only support specific OS ecosystems (iOS vs. Android). You’ll also need to check if your phone’s width fits the telescopic range.
Backbone-Style Controllers
Backbone-style controllers are essentially premium telescopic designs with added features like pass-through charging, dedicated capture buttons, and app integration. The Backbone One remains dominant in this category, especially for iOS users, but Android alternatives have improved significantly in 2026.
What sets these apart is the ecosystem. Backbone’s app offers social features, game library integration, and one-tap recording. Build quality also tends to be a step up, with rubberized grips and clickier buttons that feel closer to first-party console controllers.
You’re paying for that polish, though. Expect to spend $100-150 versus $50-80 for standard telescopic models. If you game daily and value the convenience features, the premium is justified. Casual players can save money elsewhere.
Standalone Bluetooth Controllers
Standalone Bluetooth controllers look and feel like traditional gamepads but are designed specifically for mobile use. The 8BitDo SN30 Pro and SteelSeries Stratus+ are solid examples. You pair them wirelessly and prop your phone on a stand or in a case with kickstand functionality.
These controllers offer maximum flexibility, you can connect to phones, tablets, or even smart TVs. Battery life is typically excellent (20-40 hours), and many support multiple device pairings for quick switching.
The trade-off? You need a separate phone mount or stand, which adds bulk and setup time. For couch gaming or tablet use, they’re great. For on-the-go sessions, telescopic or Backbone-style controllers are more practical.
Key Features to Look for When Buying a Mobile Gaming Controller
Not all controllers are created equal. Here’s what separates the good from the “why did I buy this” garbage.
Compatibility and Device Support
Check three things before you buy: operating system support, physical fit, and game compatibility. Some controllers only work with iOS or Android, not both. The Backbone One, for instance, has separate iPhone and Android versions, buy the wrong one and you’re stuck.
Physical fit matters more than you’d think. Most controllers list compatible phone sizes, but that’s usually without cases. If you rock a thick Otterbox or MagSafe battery pack, measure your setup before ordering. Telescopic controllers especially struggle with bulky cases.
Game compatibility varies too. Most modern titles support controllers, but not all. Check if your go-to games have gamepad support enabled, some developers lock it behind specific modes or don’t offer it at all. According to testing by PCMag, roughly 65% of top-grossing mobile games in 2026 have controller support, up from 48% in 2024.
Build Quality and Ergonomics
Plastic quality, grip texture, and weight distribution separate premium controllers from budget trash. Cheap controllers often use hollow, creaky plastic that flexes under pressure. Look for rubberized grips, solid housing, and reinforced clamps if you’re going telescopic.
Ergonomics are subjective but critical. Controllers with contoured grips reduce hand fatigue during long sessions. Button placement matters too, if your thumbs feel cramped or stretched during basic movement + aiming, the layout isn’t right for your hand size. If possible, check return policies so you can test comfort before committing.
Weight is underrated. Too light and the controller feels cheap and unbalanced. Too heavy and your wrists will ache after an hour. Aim for the 200-300g range for phones: anything over 350g starts to drag.
Button Layout and Responsiveness
Button feel is everything. Mushy buttons with inconsistent travel distance will wreck your inputs, especially in games where frame-perfect timing matters. Look for tactile, clicky buttons with clear actuation points. Analog sticks should have smooth 360-degree rotation with zero drift out of the box.
Trigger quality is make-or-break for shooters and racing games. Cheap triggers are either too stiff (finger fatigue) or too loose (no resistance feedback). The best controllers use progressive triggers with distinct travel stages, light press for ADS, full press for firing.
Extra buttons are a nice-to-have. Some controllers add programmable back paddles for advanced inputs. If you’re into competitive shooters where jump-shotting or slide-canceling matters, remappable buttons can give you an edge without claw-gripping your phone.
Battery Life and Charging Options
Wired controllers (USB-C or Lightning) draw power from your phone. That’s great for zero latency but drains your battery faster. If you’re planning 3+ hour sessions, pack a power bank or look for controllers with pass-through charging, these let you charge your phone while playing.
Bluetooth controllers run on internal batteries, typically lasting 15-40 hours depending on the model. Cheaper options use AA batteries (annoying, but swappable). Better controllers have built-in rechargeable batteries with USB-C charging. Check if the controller supports play-and-charge functionality, some force you to stop playing while charging.
Charging time matters too. Premium controllers charge in 2-3 hours. Budget models can take 5+ hours, which sucks if you forget to plug in overnight.
Best Mobile Games to Play with a Controller
Controllers unlock the full potential of dozens of mobile titles. Here are the genres and specific games where they make the biggest difference.
Competitive shooters are the obvious win. Call of Duty Mobile, PUBG Mobile, and Apex Legends Mobile all support controllers, and the accuracy boost is massive. You’ll compete directly with other controller users in most ranked modes, matchmaking separates input methods to keep things fair.
Action-adventure ports shine with physical controls. Dead Cells, Hades, Genshin Impact, and Diablo Immortal all feel drastically better with analog movement and dedicated dodge/attack buttons. Touchscreen overlays in these games cover 30-40% of the screen: controllers free up that space entirely.
Platformers and roguelikes demand precision that touch controls can’t consistently deliver. Castlevania: SotN, Stardew Valley, Slay the Spire, and Hollow Knight are all playable on mobile with controller support. Frame-perfect jumps and dodge rolls stop being a gamble.
Racing games like Asphalt 9, GRID Autosport, and Real Racing 3 benefit from analog triggers for throttle control. Tilt steering works, but triggers + stick give you finer control in tight corners.
AAA mobile ports are where controllers become mandatory. Games like Resident Evil Village, Assassin’s Creed Mirage, and Death Stranding Director’s Cut run on flagship phones like the iPhone 15 Pro but expect console-style inputs. Trying to play these with touch controls is technically possible but borderline masochistic.
Even casual games like Brawl Stars and Pokémon Unite see improvement with controllers, though the advantage is less pronounced. If your library skews toward puzzle games or turn-based strategy, stick with touch, controllers don’t add much there.
Top Mobile Gaming Controllers in 2026
Here’s what’s actually worth buying in 2026, broken down by budget tier.
Premium Options for Serious Gamers
Backbone One (2nd Gen) remains the gold standard for iOS users. The updated version (released Q4 2025) added USB-C support for iPhone 15/16 models, improved analog stick sensors, and a slightly wider clamp for Pro Max devices. The companion app still leads the pack for features, and build quality is unmatched. Expect to pay $130-150 depending on special editions.
Razer Kishi V2 Pro is the Android equivalent, though it works with iPhone 15+ as well via separate USB-C model. It adds programmable buttons via Razer’s Nexus app and Chroma RGB lighting (because of course it does). Slightly cheaper than Backbone at $120-130, and the button feel is arguably better, clickier with less mushiness. Battery life isn’t a concern since it’s wired, and input lag is imperceptible.
GameSir X4 Aileron flew under the radar until mid-2025 but has become a favorite among competitive mobile gamers. It supports Hall Effect sticks (magnetic sensors that eliminate stick drift), swappable faceplates, and detachable back paddles. At $110, it undercuts Backbone and Razer while matching or exceeding their feature sets. The catch? Slightly less polished app integration and a clunkier clamp mechanism.
All three of these controllers are regularly featured in gear breakdowns on sites like ProSettings, where pro mobile esports players share their configs and hardware.
Budget-Friendly Alternatives
GameSir X2 Pro (not to be confused with the X4) hits the sweet spot for budget-conscious buyers. It’s a wired USB-C/Lightning telescopic controller with solid build quality and responsive buttons for $50-60. The main compromise? No pass-through charging and slightly cheaper plastic compared to premium models. But for casual players or those testing the controller waters, it’s hard to beat.
8BitDo Ultimate Mobile Controller is a Bluetooth option that launched in early 2026 at $60. It’s a standalone controller (not telescopic) with excellent battery life (30+ hours), a phone clip included in the box, and multi-device pairing. The D-pad is especially good, one of the best on any mobile controller. The downside is the extra hassle of setting up a phone mount every time, but if you mostly game at home, that’s less of an issue.
iPega PG-9167 is the ultra-budget pick at $30-35. It’s a telescopic Bluetooth controller with basic features, no bells, no whistles, just buttons and sticks that work. Build quality feels cheap, and button responsiveness isn’t great for competitive play, but for story-driven games or emulation, it gets the job done. Think of it as the controller equivalent of training wheels: fine for starting out, but you’ll want to upgrade eventually.
For those who prefer touchscreen but want better precision, gaming thumb sleeves are a cheap interim solution while you save up for a full controller.
How to Set Up and Configure Your Mobile Gaming Controller
Setup is usually straightforward, but each OS has quirks. Here’s the step-by-step for both platforms.
iOS Setup Process
For wired controllers (Backbone, Kishi, etc.), just plug in via Lightning or USB-C. iOS recognizes MFi-certified controllers instantly, no pairing needed. You’ll see a brief on-screen notification confirming connection.
For Bluetooth controllers:
- Put the controller in pairing mode (usually hold Home + Y for 3 seconds, but check your manual).
- Open Settings > Bluetooth on your iPhone.
- Select the controller from the available devices list.
- Once connected, test inputs by opening any controller-supported game.
iOS doesn’t have universal controller settings, so button remapping happens per-game. Some titles like Call of Duty Mobile have in-game settings menus for controller layout and sensitivity. Others use default mappings with no customization, you’re stuck with whatever the developer chose.
Want to see which games support controllers? The App Store has a “Controller Support” filter under categories, but it’s inconsistent. Your best bet is checking game descriptions or community forums.
Android Setup Process
Wired controllers work the same as iOS, plug and play. Android has broader compatibility since it’s not locked to MFi certification, so even generic USB-C controllers often work fine.
Bluetooth pairing:
- Enable pairing mode on the controller.
- Open Settings > Connected Devices > Pair New Device.
- Select the controller when it appears.
- Android will show an on-screen setup guide for first-time controller connections.
Android’s advantage is system-level button remapping. Go to Settings > System > Buttons (on some devices it’s under Accessibility) to customize inputs globally. Apps like Mantis Gamepad Pro offer even deeper remapping, including macros and combo inputs.
Game compatibility is hit-or-miss. Google Play doesn’t filter for controller support as clearly as the App Store, so you’re often testing games manually. Most premium paid titles support controllers: F2P games are more inconsistent.
Troubleshooting Common Issues
If your controller connects but inputs don’t register, restart both the controller and your phone. Sounds dumb, but it fixes 90% of issues.
For Bluetooth controllers with input lag, check if other Bluetooth devices are interfering. Disconnect wireless earbuds, smartwatches, or nearby accessories. Bluetooth bandwidth is limited: too many devices cause stuttering.
If your phone doesn’t fit in a telescopic controller, remove your case. If it still doesn’t fit, you likely bought the wrong model, double-check the device compatibility list. Some controllers have model-specific versions (e.g., Backbone’s separate iPhone vs. Android editions).
Stick drift on a brand-new controller? That’s a defect. Don’t waste time with software fixes, return it immediately. Drift out of the box means poor quality control, and it’ll only get worse.
Buttons sticking or feeling mushy? Try compressed air around the button edges. If that doesn’t help, it’s another build quality issue. Cheap controllers love to ship with debris under the button caps.
Mobile Gaming Controller vs. Touch Controls: Which Is Better?
Touch controls have improved, adaptive triggers, haptic overlays, and customizable HUD layouts make them viable for many games. But controllers still win in most scenarios. Here’s the honest breakdown.
Precision and accuracy heavily favor controllers. Analog sticks offer 360 degrees of smooth input: virtual sticks are limited by screen resolution and finger slippage. Testing data from competitive mobile shooters shows controller users consistently out-aim touch players in high-pressure situations. That’s why ranked modes separate input methods.
Reaction time is slightly faster with touch for certain actions, single taps are instantaneous. But complex inputs (jump + aim + shoot simultaneously) are faster with controllers since you’re using multiple fingers on dedicated buttons instead of sequencing taps on glass.
Screen visibility is a non-contest. Touch controls cover 25-40% of your display depending on the game. Controllers give you the full screen. That extra real estate matters in cluttered firefights or platformer sections with precise jump timing.
Portability and convenience are where touch wins. You always have your phone. Controllers add bulk, require charging or battery swaps, and need setup time. For quick 10-minute sessions on a bus, touch is faster. For dedicated hour-long grinding sessions, controllers are worth the hassle.
Genre matters more than anything. For puzzle games, card battlers, and turn-based strategy, touch is often better, direct screen interaction is more intuitive than navigating cursors with sticks. For action games, shooters, platformers, and anything requiring precise timing or aiming, controllers are objectively superior.
The meta shift toward crossplay has also elevated controllers. Games like Fortnite Mobile and Call of Duty Mobile match you against console and PC players when using a controller. That raises the skill ceiling, touch controls hit a performance plateau that physical inputs blow past.
Tips for Getting the Most Out of Your Mobile Gaming Controller
Buying a controller is step one. Getting the most from it takes a few tweaks and habits.
Customize sensitivity settings per game. Default sensitivity is rarely optimal. Spend 10-15 minutes in training modes adjusting stick deadzone, aim acceleration, and trigger sensitivity. Most competitive games let you save multiple profiles, create separate configs for ADS vs. hipfire or different weapon classes.
Experiment with button remapping. If your controller has back paddles or programmable buttons, map frequently-used actions (jump, crouch, reload) to them. This lets you keep your thumbs on the sticks during critical moments. Even without extra buttons, some games let you remap standard controls, swap face buttons if the default layout feels awkward.
Keep firmware updated. Premium controllers (Backbone, Razer, GameSir) push firmware updates that improve input latency, fix stick drift, and add features. Check the manufacturer’s app every few weeks. Skipping updates means missing performance improvements.
Maintain your controller. Dust and grime build up fast. Use compressed air around buttons and stick bases monthly. If you’ve got removable grips or faceplates, clean them with isopropyl alcohol. Sticky buttons from snack residue will ruin clutch moments faster than lag ever will.
Adjust your playstyle for controller lobbies. If you’re coming from touch controls, expect a skill reset period. Controller lobbies are sweatier, you’re competing against players with equivalent precision. Don’t get discouraged if your K/D tanks for the first week. The skill ceiling is higher, but so is the reward.
Use pass-through charging on long sessions. If your controller supports it, plug your phone into power while playing. Nothing’s worse than grinding ranked for two hours only to have your phone die at 3% during a final match.
Explore emulation. If you’re into retro gaming, controllers unlock the full potential of emulators like Delta (iOS) or RetroArch (Android). Games designed for SNES, Genesis, or PSX controllers feel authentic with physical inputs. Touch controls for emulation are borderline unplayable.
Finally, engage with the community. Subreddits like r/AndroidGaming and r/iOSGaming share controller-specific tips, game recommendations, and troubleshooting help. Content creators on platforms like TikTok have made mobile gaming more mainstream, and many now focus on controller setups and advanced techniques.
For deeper dives into mobile gaming strategies and gear, sites like Pocket Tactics offer tier lists, build guides, and meta analysis that pairs well with controller optimization.
Conclusion
Mobile gaming controllers have matured from niche accessories to must-have gear for anyone serious about their phone as a gaming platform. Whether you’re climbing ranked ladders, running through AAA ports, or just want more comfortable Stardew Valley sessions, the right controller transforms the experience.
The investment is scalable, budget picks start at $30, and even those offer massive improvements over touch controls. If mobile gaming is a daily habit, premium controllers justify their cost through better build quality, longer lifespans, and features that streamline your setup.
Pick the form factor that matches your use case: telescopic for portability, Backbone-style for premium features, or standalone Bluetooth if you already have a tablet setup. Prioritize compatibility, build quality, and button feel over flashy extras. And don’t skip the setup tweaks, sensitivity tuning and remapping are where you’ll find the real performance gains.
Mobile gaming isn’t casual anymore. The hardware is here. Now it’s on you to use it.